Prerequisites
- Visual Studio 2022.
- NET 6 SDK is used in the example.
ASP.NET
ASP.NET extends the .NET platform with tools and libraries specifically for building web apps. These are some things that ASP.NET adds to the .NET platform:
- Base framework for processing web requests in C#
- Web-page templating syntax, known as Razor, for building dynamic web pages using C#
- Libraries for common web patterns, such as Model View Controller (MVC)
- Authentication system that includes libraries, a database, and template pages for handling logins, including multi-factor authentication and external authentication with Google, Twitter, and more.
- Editor extensions to provide syntax highlighting, code completion, and other functionality specifically for developing web pages
Back-end code When using ASP.NET your back-end code, such as business logic and data access, is written using C#, F#, or Visual Basic. Because ASP.NET extends .NET, you can use the large ecosystem of packages and libraries available to all .NET developers. You can also author your own libraries that are shared between any applications written on the .NET platform.
Dynamic pages using C#, HTML, CSS, and JavaScript Razor provides a syntax for creating dynamic web pages using HTML and C#. Your C# code is evaluated on the server and the resulting HTML content is sent to the user. Code that executes client-side is written in JavaScript. ASP.NET integrates with JavaScript frameworks and includes pre-configured templates for single page app (SPA) frameworks like React and Angular.
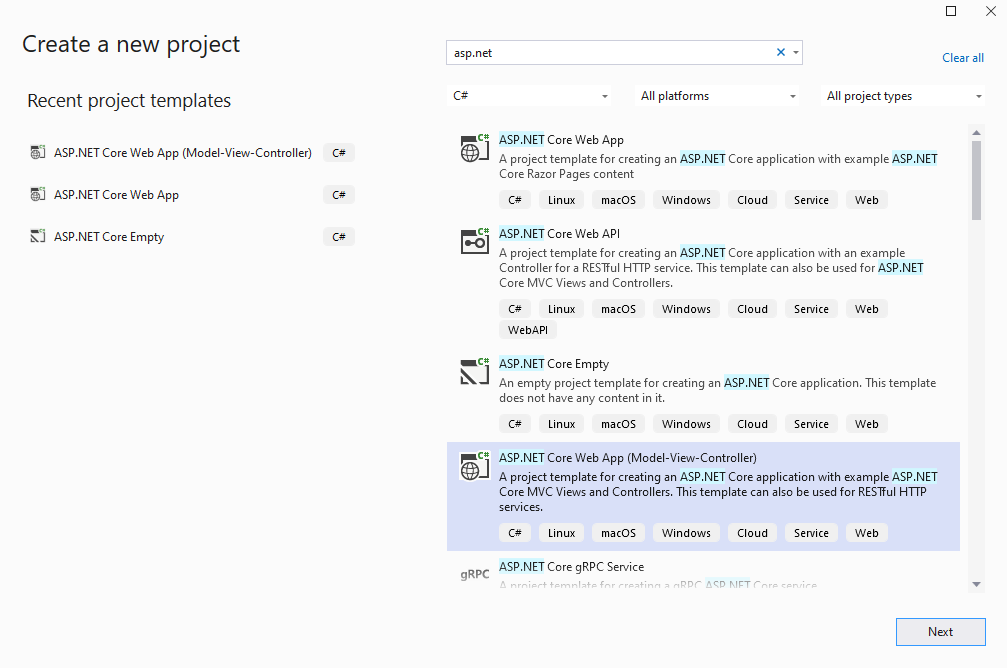
Creating the ASP.NET project
To create the ASP.NET program, follow the steps below:
- Create ASP.NET Project.
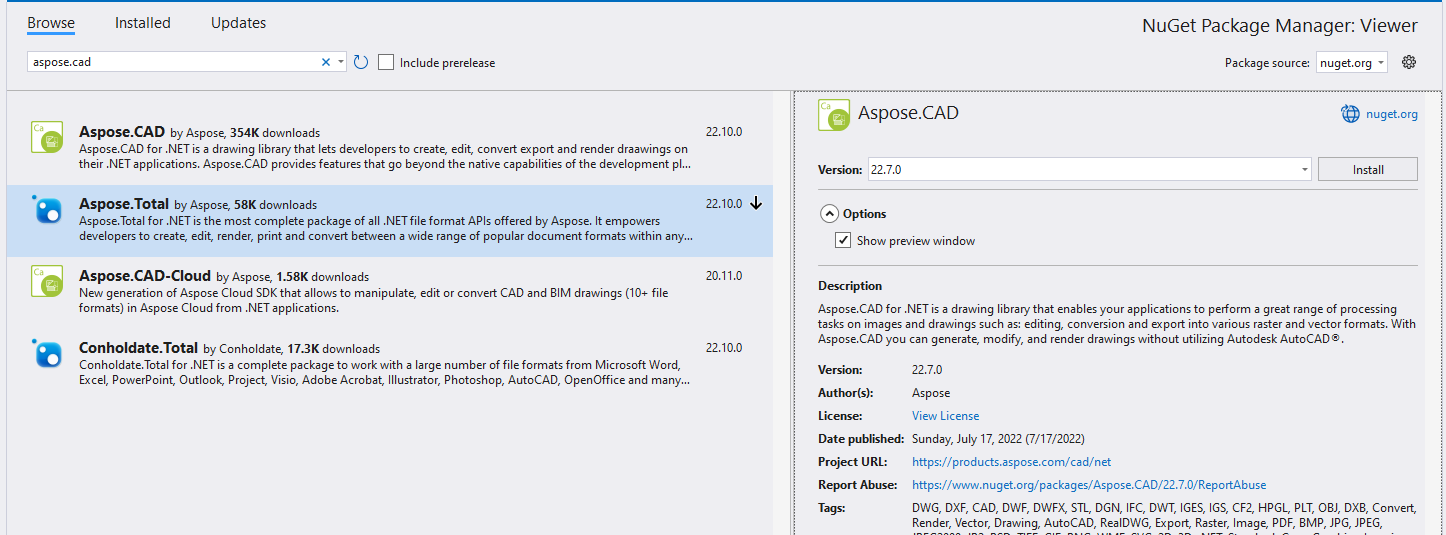
- Install the latest libraries from NuGet.
- Add loader spinner to _Layout.cshtml
<!DOCTYPE html>
<html lang="en">
<head>
     <meta charset="utf-8" />
    <meta name="viewport" content="width=device-width, initial-scale=1.0" />
    <title>@ViewData["Title"] - Viewer</title>
    <link rel="stylesheet" href="~/lib/bootstrap/dist/css/bootstrap.min.css" />
    <link rel="stylesheet" href="~/css/site.css" asp-append-version="true" />
    <link rel="stylesheet" href="~/Viewer.styles.css" asp-append-version="true" />
</head>
<body>

    <div id="loader">
        <div class="spinner"></div>
    </div>

    @RenderBody()

    <script src="~/lib/jquery/dist/jquery.min.js"></script>
    <script src="~/lib/bootstrap/dist/js/bootstrap.bundle.min.js"></script>
    <script src="~/js/site.js" asp-append-version="true"></script>
    @await RenderSectionAsync("Scripts", required: false)
</body>
</html>
Add JavaScript for spinner to Index.cshtml.
<script type="text/javascript">
    function getLoader() {
        var loader = document.getElementById("loader");

        if (loader.style.display == "")
            loader.style.display = "block";
        else
            loader.style.display = "none";
    }
</script>
Create upload method in HomeController.
public class HomeController : Controller
{
    private readonly ILogger<HomeController> _logger;

    public HomeController(ILogger<HomeController> logger)
    {
        _logger = logger;
    }

    public IActionResult Index()
    {
        return View();
    }

    [ResponseCache(Duration = 0, Location = ResponseCacheLocation.None, NoStore = true)]
    public IActionResult Error()
    {
        return View(new ErrorViewModel { RequestId = Activity.Current?.Id ?? HttpContext.TraceIdentifier });
    }

    [HttpPost]
    public ActionResult Upload(IFormFile file)
    {
        try
        {
            var ms = new MemoryStream();
            var image = Image.Load(file.OpenReadStream());
            image.Save(ms, new PngOptions());

            return View("Index", Convert.ToBase64String(ms.ToArray())); // return base64 model to Index
        }
        catch(Exception ex)
        {
            return BadRequest(ex.Message);
        }

    }
}
Add upload file form to index.cshtml.
@if (Model != null)
{
    <img src="data:image/png;base64, @Model" /> // show image in browser if file is uploaded
}

<form method="post" class="form-control" enctype="multipart/form-data" asp-controller="Home" asp-action="Upload" style="text-align: center;">
    <div>
        <span>Select File:</span>
        <input type="file" name="file" multiple />
    </div>
    <input type="submit" value="Upload" onclick='getLoader()' />
</form>
Create style for spinner in wwwroot/css/site.css file.
html {
  font-size: 14px;
}

@media (min-width: 768px) {
  html {
    font-size: 16px;
  }
}

html {
  position: relative;
  min-height: 100%;
}

body {
  margin-bottom: 60px;
}

img {
    display:block;
    margin:auto;
    max-height: 80%;
    max-width: 80%;
}

.spinner {
    margin: auto;
    margin-top: 20%;
    border: 16px solid #296fab; /* Blue */
    border-top: 16px solid #0a8f33; /* Green */
    border-radius: 50%;
    width: 120px;
    height: 120px;
    animation: spin 2s linear infinite;
}

#loader {
    display: none;
    position: absolute;
    height: 100%;
    width: 100%;
    background-color: #e1e1e1;
}

@keyframes spin {
    0% {
        transform: rotate(0deg);
    }

    100% {
        transform: rotate(360deg);
    }
}
Execution example
- Click choose button

- Select DWG file
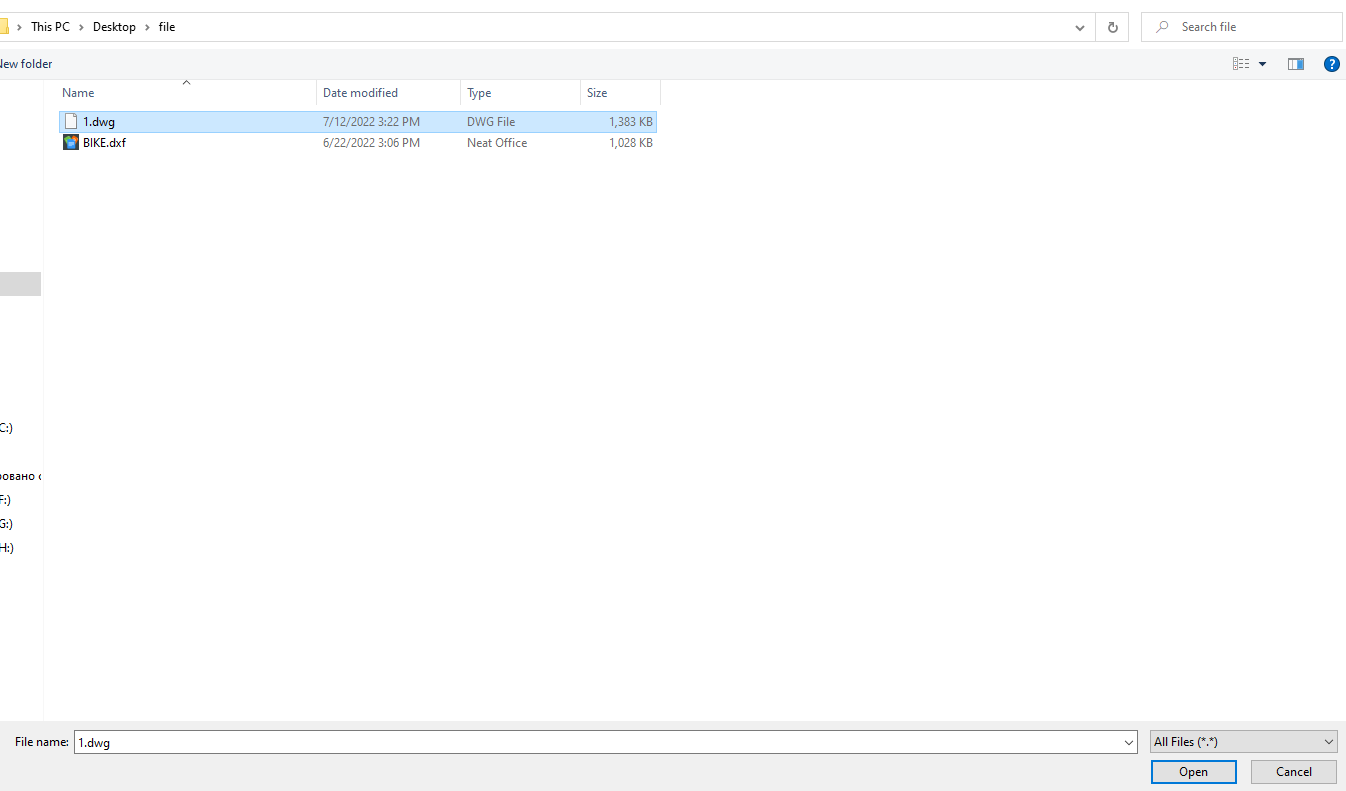
- Click Upload button
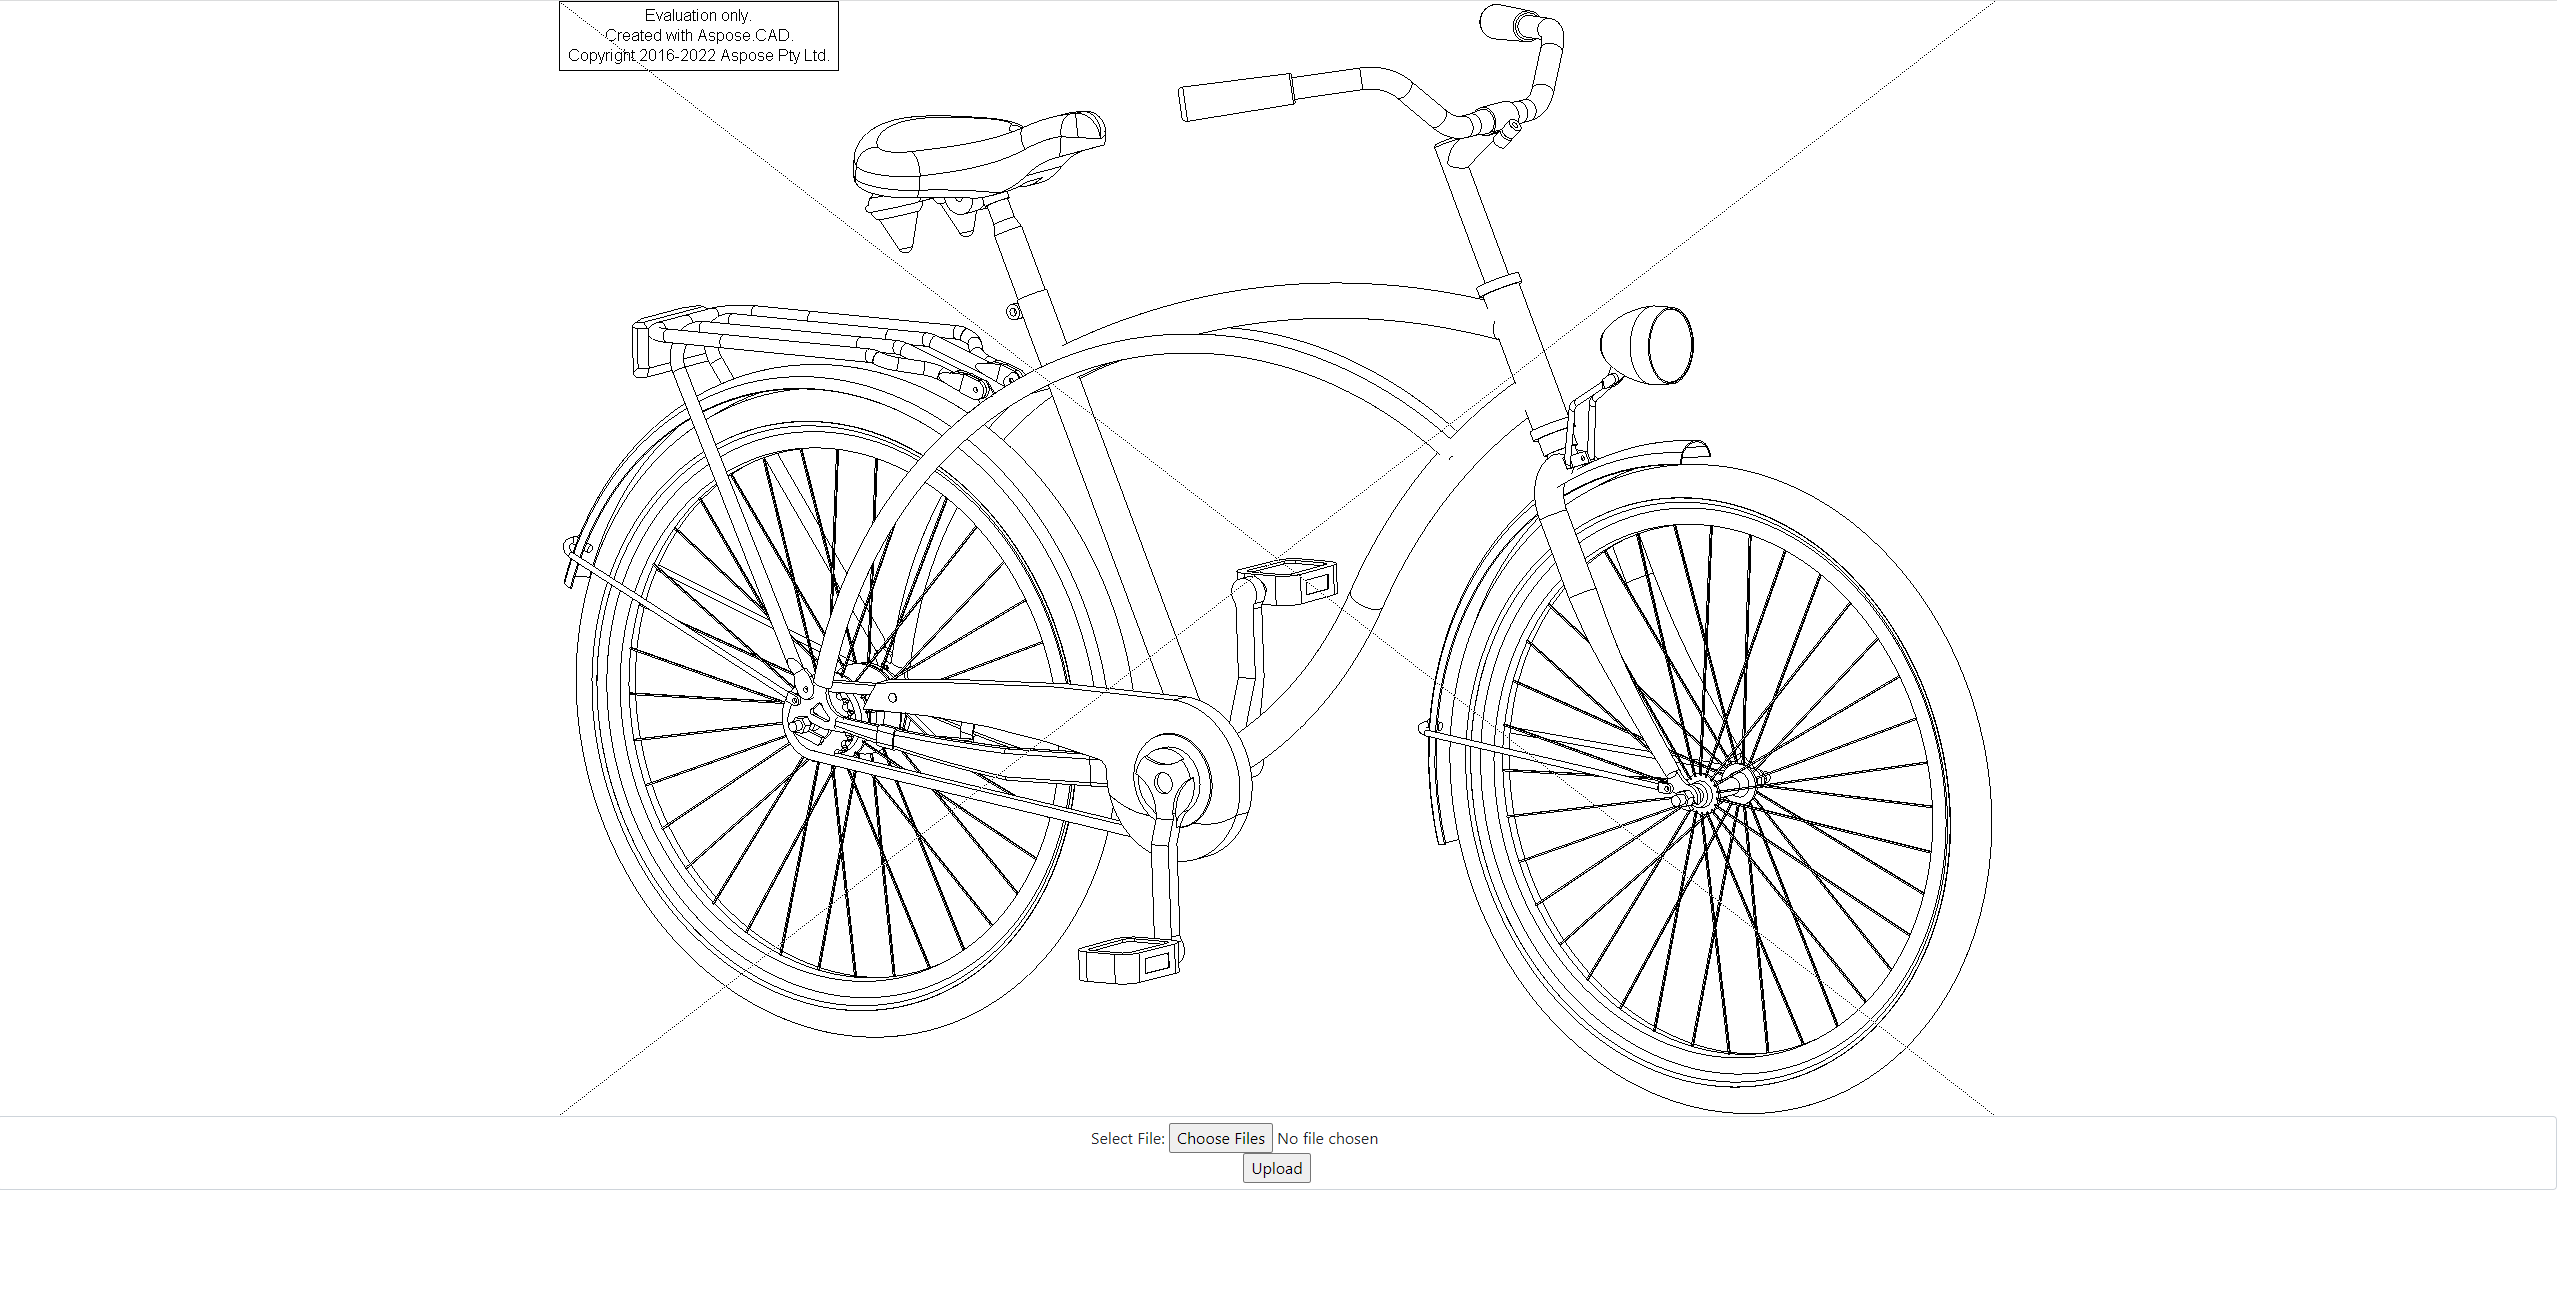
- Wait for processing to finish

- After processing is completed, the spinner will disappear and the image will be displayed on the screen