Python has become one of the ruling programming languages in the past few years. The usefulness and popularity of Python have immensely grown the community of Python enthusiasts. On the other hand, spreadsheet automation has made it easier to keep, organize, and play with a large amount of data from within the web or desktop applications. This article aims to put together Python and spreadsheet automation to show you how to create Excel XLSX or XLS files in Python. Furthermore, you will learn how to insert data, images, charts, and tables in an Excel file programmatically using Python.
- Python API to Create Excel Files
- Create Excel Files in Python
- Insert Data into Existing Excel File in Python
- Create Excel File having Images in Python
- Generate Charts within Excel XLS in Python
- Create Pivot Tables in Excel XLSX in Python
- Get Free License to Create Excel Files in Python
Python API to Create Excel XLS Files - Free Download
Aspose.Cells for Python is a powerful yet easy to use spreadsheet manipulation API that lets you implement spreadsheet automation within your applications using Python. You can create new Excel files as well as update and convert existing spreadsheet documents in a few lines of code. In order to integrate and use Aspose.Cells for Python via Java, execute the following pip command.
pip install aspose-cells
You can also download the API’s package from the downloads section.
Create Excel XLSX Files in Python
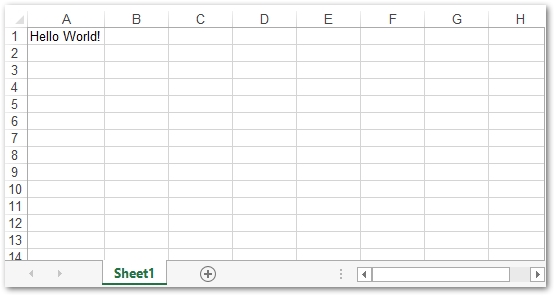
Let’s start by creating a simple Excel XLSX file using Aspose.Cells for Python via Java. The following are the steps to do this:
- Create a new object of Workbook class.
- Access the desired Worksheet in the workbook using Workbook.getWorksheets().get(index) method.
- Put value in the desired cell using Worksheet.getCells().get(“A1”).putValue() method.
- Save the workbook as .xlsx file using Workbook.save() method.
The following code sample shows how to create an Excel XLSX file using Python.
Output
Python Code to Insert Data into an Excel File
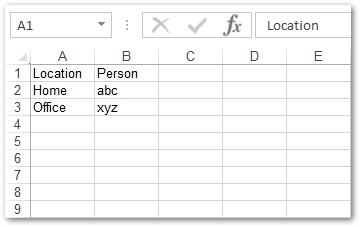
In the previous example, you have created a new Excel XLSX file from scratch. However, there might be the case when you need to update the content of an existing Excel file. In this case, you can load the Excel file by providing its path to the Workbook constructor. The rest of the methods for accessing the worksheets and cells will remain the same.
The following code sample shows how to update an Excel file using Python.
Output
Python Create Excel File having Images
In both of the previous examples, you have seen how to insert or update text in the cells of Excel worksheets. Let’s now check out how to insert an image into the worksheet using Python.
- Create a new Excel workbook or load an existing one using Workbook class.
- Access the worksheet in which you want to insert the image using Worksheet class.
- Insert image using Worksheet.getPictures().add(upperLeftRow, upperLeftColumn, fileName) method.
- Save the workbook as .xlsx file using Workbook.save(fileName) method.
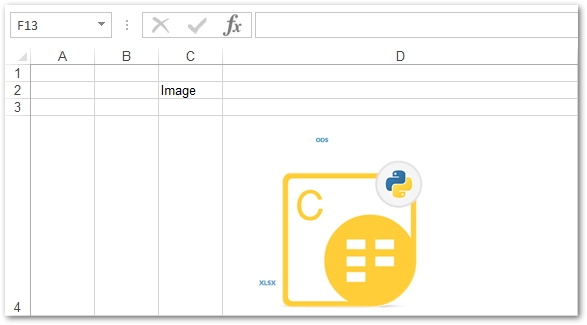
The following code sample shows how to create an Excel file and insert an image using Python.
Output
Generate Charts within Excel XLS in Python
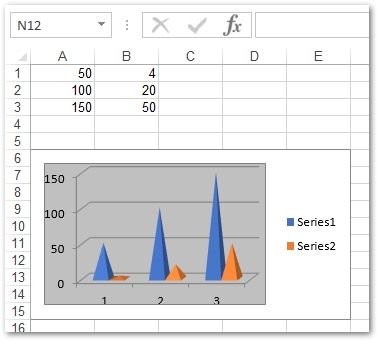
Charts in Excel worksheets are used to visually represent the data in the form of histograms, pyramids, bars, doughnuts and etc. Aspose.Cells for Python via Java supports a multitude of chart types that are listed here. The following are the steps to generate a chart within an Excel worksheet.
- Create a new Excel workbook or load an existing one using Workbook class.
- Access the desired worksheet and add values in the cells (optional if the worksheet already contains data).
- Get charts collection using Worksheet.getCharts() method.
- Add a new chart in the charts collection using Worksheet.getCharts().add(type, upperLeftRow, upperLeftColumn, lowerRightRow, lowerRightColumn) method.
- Define the range of the cells to set NSeries for the chart.
- Create the Excel .xlsx file using Workbook.save(fileName) method.
The following code sample shows how to generate charts in an Excel XLS using Python.
Output
Create Excel Pivot Tables in Python
Pivot tables in Excel are created to summarize a large amount of data within the worksheets. You can specify the range of the cells to be used in the pivot table. The following are the steps to create a pivot table using Aspose.Cells for Python via Java.
- Load the Excel file or create a new one using Workbook class.
- Insert data into the worksheet (optional).
- Access pivot tables using Worksheet.getPivotTables() method.
- Add a new pivot table using Worksheet.getPivotTables().add(sourceData, destCellName, tableName) method.
- Configure row, column, and the data areas of the pivot table.
- Save the workbook as .xlsx using Workbook.save(fileName) method.
The following code sample shows how to create a pivot table in Excel XLSX using Python.

Python API to Create Excel Files - Get a Free License
Get a free temporary license and create Excel files using Aspose.Cells for Python without evaluation limitations.
Conclusion
In this article, you have seen how to create Excel files from scratch using Python. Furthermore, you have learned how to insert data, images, charts, and pivot tables within Excel worksheets programmatically. You can learn more about Aspose’s Python Excel API using the documentation.
See Also
- Convert Excel Files to PDF using Python
- Read Excel Files in Python
- Export Excel Data to Google Sheets in Python
- Add Watermark to Excel Files in Python
- Add Comments in Excel Worksheets in Python
- Create PowerPoint Files in Python
- Convert PowerPoint PPT to HTML in Python
- Convert Excel File to JSON in Python
- Convert TXT to XML in Python
- Convert CSV to TXT in Python
- Convert JSON Data to CSV using Python
- Convert CSV to Excel XLS XLSX in Python
- Create Excel Files in C#
Info: Aspose provides other Python APIs (for example, Aspose.Slides for Python via .NET for working with PowerPoint and presentations in other formats) and free online tools for viewing, editing, merging, and converting documents (for example, the PPT to JPG converter).