画像の編集と操作がプログラムで実行されるさまざまなシナリオがあります。画像編集では、画像のマージは、コラージュを作成するなど、2 つ以上の画像を結合するために使用される重要な機能です。この記事では、Java で複数の画像を 1 つの画像にマージする方法を学習します。画像を水平および垂直にマージする方法を明示的に示します。
画像をマージする Java API - 無料ダウンロード
Aspose.Imaging for Java は、幅広い画像フォーマットを操作できる強力な画像処理 API です。画像編集に必要なさまざまな機能を提供します。この API を使用して、このブログ投稿で画像をマージします。 API を ダウンロード するか、次の Maven 構成を使用してインストールできます。
<repository>
    <id>AsposeJavaAPI</id>
    <name>Aspose Java API</name>
    <url>https://repository.aspose.com/repo/</url>
</repository>

<dependency>
    <groupId>com.aspose</groupId>
    <artifactId>aspose-imaging</artifactId>
    <version>22.7</version>
</dependency>
Java で複数の画像を結合する
縦方向と横方向の 2 つの方法のいずれかで画像を結合できます。垂直合成では、画像を垂直方向に 1 つずつ合成します。一方、水平結合では、画像は水平方向に互いに追加されます。それでは、両方の方法で画像をマージする方法を見てみましょう。
Javaで画像を水平方向にマージ
以下は、Java を使用して画像を水平方向にマージする手順です。
- まず、画像のパスを文字列配列で指定します。
- 結果のイメージの高さと幅を計算します。
- JpegOptions クラスのオブジェクトを作成し、必要なオプションを設定します。
- JpegImage クラスのオブジェクトを作成し、JpegOptions オブジェクトと結果の画像の高さと幅で初期化します。
- 画像のリストをループし、RasterImage クラスを使用して各画像を読み込みます。
- 各画像の Rectangle を作成し、JpegImage.saveArgb32Pixels() メソッドを使用して結果の画像に追加します。
- 各反復でステッチ幅を増やします。
- 完了したら、JpegImage.save(string) メソッドを使用して結果の画像を保存します。
次のコード サンプルは、Java で画像を水平方向にマージする方法を示しています。
// 画像一覧
String[] imagePaths = { "image.jpg", "image.jpg" };

// 出力画像パス
String outputPath = "output-horizontal.jpg";
String tempFilePath = "temp.jpg";

// 結果の画像サイズを取得する
int newWidth = 0;
int newHeight = 0;
for (String imagePath : imagePaths) {
	try (RasterImage image = (com.aspose.imaging.RasterImage) com.aspose.imaging.Image.load(imagePath)) {
		Size size = image.getSize();
		newWidth += size.getWidth();
		newHeight = Math.max(newHeight, size.getHeight());
	}
}

// 画像を結合して新しい画像にする
try (JpegOptions options = new JpegOptions()) {
	Source tempFileSource = new FileCreateSource(tempFilePath, true);
	options.setSource(tempFileSource);
	options.setQuality(100);

  	// 結果の画像を作成する
	try (JpegImage newImage = (JpegImage) Image.create(options, newWidth, newHeight)) {
		int stitchedWidth = 0;
		for (String imagePath : imagePaths) {
			try (RasterImage image = (RasterImage) Image.load(imagePath)) {
				Rectangle bounds = new Rectangle(stitchedWidth, 0, image.getWidth(), image.getHeight());
				newImage.saveArgb32Pixels(bounds, image.loadArgb32Pixels(image.getBounds()));
				stitchedWidth += image.getWidth();
			}
		}

    		// 出力画像を保存
		newImage.save(outputPath);
	}
}
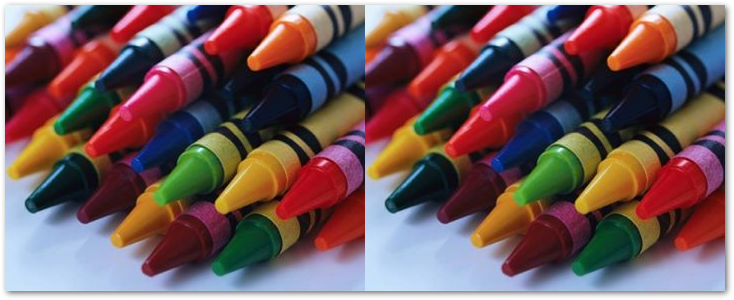
次の画像は、2 つの類似した画像を水平方向にマージした結果を示しています。
Java で画像を垂直方向に結合する
画像を垂直方向にマージするには、高さと幅のプロパティの役割を切り替えるだけです。コードの残りの部分は同じです。次のコード サンプルは、Java で複数の画像を垂直方向にマージする方法を示しています。
// 画像一覧
String[] imagePaths = { "image.jpg", "image.jpg" };

// 出力画像のパス
String outputPath = "output-vertical.jpg";

// 結果の画像サイズを取得する
int newWidth = 0;
int newHeight = 0;
for (String imagePath : imagePaths) {
	try (RasterImage image = (RasterImage) Image.load(imagePath)) {
		Size size = image.getSize();
		newWidth = Math.max(newWidth, size.getWidth());
		newHeight += size.getHeight();
	}
}

// 画像を結合して新しい画像にする
try (JpegOptions options = new JpegOptions()) {
	options.setSource(new StreamSource()); // empty
	options.setQuality(100);

  	// 結果の画像を作成する
	try (JpegImage newImage = (JpegImage) Image.create(options, newWidth, newHeight)) {
		int stitchedHeight = 0;
		for (String imagePath : imagePaths) {
			try (RasterImage image = (RasterImage) Image.load(imagePath)) {
				Rectangle bounds = new Rectangle(0, stitchedHeight, image.getWidth(), image.getHeight());
				newImage.saveArgb32Pixels(bounds, image.loadArgb32Pixels(image.getBounds()));
				stitchedHeight += image.getHeight();
			}
		}
    		// 結果の画像を保存
		newImage.save(outputPath);
	}
}
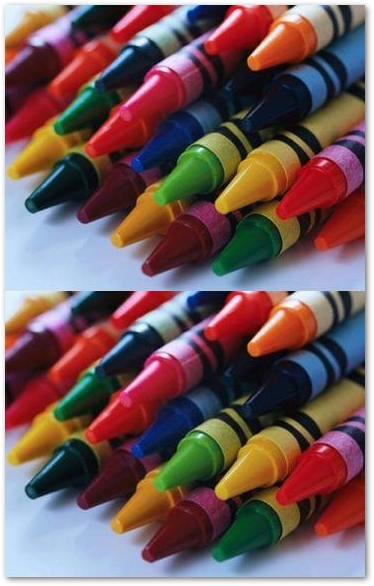
次の画像は、2 つの類似した画像を垂直方向にマージした結果を示しています。
JavaでPNG画像をマージする
前のセクションでは、JPG 形式の画像を結合する方法を説明しました。ただし、PNG 形式の画像もマージする必要がある場合があります。 PNG 画像をマージするには、JpegImage および JpegOptions クラスをそれぞれ PngImage および PngOptions クラスに置き換えるだけで、残りのコードは同じままです。
次のコード サンプルは、Java で PNG 形式の複数の画像をマージする方法を示しています。
// 画像一覧
String[] imagePaths = { "image.png", "image.png" };

// 出力画像パス
String outputPath = "output-horizontal.png";
String tempFilePath = "temp.png";

// 結果の画像サイズを取得する
int newWidth = 0;
int newHeight = 0;
for (String imagePath : imagePaths) {
	try (RasterImage image = (com.aspose.imaging.RasterImage) com.aspose.imaging.Image.load(imagePath)) {
		Size size = image.getSize();
		newWidth += size.getWidth();
		newHeight = Math.max(newHeight, size.getHeight());
	}
}

// 画像を結合して新しい画像にする
try (PngOptions options = new PngOptions()) {
	Source tempFileSource = new FileCreateSource(tempFilePath, true);
	options.setSource(tempFileSource);

  	// 結果の画像を作成する
	try (PngImage newImage = (PngImage) Image.create(options, newWidth, newHeight)) {
		int stitchedWidth = 0;
		for (String imagePath : imagePaths) {
			try (RasterImage image = (RasterImage) Image.load(imagePath)) {
				Rectangle bounds = new Rectangle(stitchedWidth, 0, image.getWidth(), image.getHeight());
				newImage.saveArgb32Pixels(bounds, image.loadArgb32Pixels(image.getBounds()));
				stitchedWidth += image.getWidth();
			}
		}
    		// 画像を保存
		newImage.save(outputPath);
	}
}
Java Image Merging API - 無料ライセンスを取得
無料の一時ライセンスを取得し、評価制限なしで画像をマージできます。
結論
この記事では、Java を使用して複数の画像を 1 つの画像にマージする方法を学びました。 Java コード サンプルは、画像を垂直方向と水平方向に結合する方法を示しています。さらに、ドキュメント を使用して、Java 画像処理 API について詳しく調べることができます。また、フォーラム を通じて質問を共有することもできます。
関連項目
情報: Aspose は 無料のコラージュ Web アプリ を提供しています。このオンライン サービスを使用すると、JPG から JPG または PNG から PNG 画像をマージしたり、フォト グリッド を作成したりできます。