PowerPoint 프레젠테이션에서는 다양한 유형의 다이어그램을 사용하여 내용을 보다 정교하게 만듭니다. 이러한 다이어그램은 타원, 선, 직사각형 및 연결선과 같은 다양한 모양으로 구성됩니다. 이 기사에서는 Python에서 프로그래밍 방식으로 PowerPoint 슬라이드의 모양을 추가, 복제 및 제거하는 방법을 배웁니다.
- PowerPoint 도형 작업을 위한 Python 라이브러리
- 파워포인트 도형의 종류
- PowerPoint 슬라이드에 모양 추가
- PowerPoint의 셰이프에 커넥터 추가
- PowerPoint 슬라이드에서 모양 복제
- PowerPoint 슬라이드에서 도형 제거
PowerPoint 도형 작업을 위한 Python 라이브러리
.NET을 통한 Python용 Aspose.Slides는 Python 응용 프로그램 내에서 PowerPoint 프레젠테이션을 만들고 조작하도록 설계되었습니다. 이 라이브러리를 사용하여 PowerPoint 슬라이드의 도형 작업을 할 것입니다. 다음 pip 명령을 사용하여 PyPI에서 설치할 수 있습니다.
> pip install aspose.slides
PowerPoint의 도형 유형
Python용 Aspose.Slides를 사용하여 PowerPoint 프레젠테이션에서 다양한 모양을 만들 수 있습니다. 가장 일반적으로 사용되는 모양은 다음과 같습니다.
Python에서 PowerPoint 슬라이드에 도형 추가
타원, 선, 직사각형을 포함한 모든 모양을 추가하려면 모양의 유형 및 기타 필요한 매개변수를 전달할 수 있는 addautoshape(ShapeType, Single, Single, Single, Single) 메서드를 사용합니다. ShapeType 열거형은 모양의 유형을 지정하는 데 사용됩니다. 다음은 Python에서 PowerPoint 슬라이드에 도형을 추가하는 단계입니다.
- Presentation 클래스를 사용하여 프레젠테이션을 만들거나 기존 프레젠테이션을 로드합니다.
- Presentation.slides 컬렉션에서 원하는 슬라이드의 참조를 가져옵니다.
- addautoshape(ShapeType, Single, Single, Single, Single) 메서드를 사용하여 타원(또는 다른 모양)을 추가합니다.
- Presentation.save(String, SaveFormat) 메서드를 사용하여 프레젠테이션을 저장합니다.
다음 코드 샘플은 Python에서 PowerPoint 슬라이드에 도형을 추가하는 방법을 보여줍니다.
import aspose.slides as slides
import aspose.pydrawing as drawing

# Create a new presentation
with slides.Presentation() as pres:
    # Get the first slide
    sld = pres.slides[0]

    # Add auto shape of ellipse type
    shp = sld.shapes.add_auto_shape(slides.ShapeType.ELLIPSE, 50, 150, 150, 50)

    # Apply some formatting to ellipse shape
    shp.fill_format.fill_type = slides.FillType.SOLID
    shp.fill_format.solid_fill_color.color = drawing.Color.pink

    # Apply some formatting to the line of Ellipse
    shp.line_format.fill_format.fill_type = slides.FillType.SOLID
    shp.line_format.fill_format.solid_fill_color.color = drawing.Color.purple
    shp.line_format.width = 5

    # Save the PPTX file to disk
    pres.save("add-ellipse.pptx", slides.export.SaveFormat.PPTX)
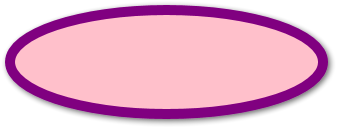
다음은 위의 코드 샘플을 사용하여 추가한 타원입니다.
Python에서 커넥터로 PowerPoint 셰이프 연결
다이어그램에서 커넥터라는 선을 사용하여 서로 다른 모양이 서로 연결됩니다. 커넥터는 직선 또는 곡선일 수 있습니다. Python에서 두 PowerPoint 셰이프 사이에 커넥터를 추가하는 방법을 살펴보겠습니다.
- 먼저 Presentation 클래스의 인스턴스를 만들어 프레젠테이션을 만들거나 로드합니다.
- 그런 다음 Presentation.slides 컬렉션을 사용하여 슬라이드의 참조를 가져옵니다.
- 이전 섹션에서 추가한 것처럼 두 개의 모양을 추가하고 해당 참조를 가져옵니다.
- addconnector(ShapeType, Single, Single, Single, Single) 메서드를 사용하여 커넥터를 만듭니다.
- Connector.startshapeconnectedto 및 Connector.endshapeconnectedto 속성을 사용하여 셰이프를 결합합니다.
- Connector.reroute() 메서드를 호출하여 최단 자동 연결 경로를 생성합니다.
- 마지막으로 Presentation.save(string, SaveFormat) 메서드를 사용하여 프레젠테이션을 저장합니다.
다음 코드 샘플은 Python에서 PowerPoint 슬라이드의 도형을 연결하는 방법을 보여줍니다.
import aspose.slides as slides
import aspose.pydrawing as drawing

# Create presentation
with slides.Presentation() as presentation:
    # Access shapes collection for selected slide
    shapes = presentation.slides[0].shapes

    # Add ellipse
    ellipse = shapes.add_auto_shape(slides.ShapeType.ELLIPSE, 0, 100, 100, 100)

    # Add auto shape rectangle
    rectangle = shapes.add_auto_shape(slides.ShapeType.RECTANGLE, 100, 300, 100, 100)

    # Add connector to connect shapes
    connector = shapes.add_connector(slides.ShapeType.BENT_CONNECTOR2, 0, 0, 10, 10)

    # Join shapes using connector
    connector.start_shape_connected_to = ellipse
    connector.end_shape_connected_to = rectangle

    # Call reroute to set the automatic shortest path between shapes
    connector.reroute()

    # Save presenation
    presentation.save("add-connector.pptx", slides.export.SaveFormat.PPTX)
다음은 연결선으로 도형을 연결한 후의 프레젠테이션 스크린샷입니다.

Python에서 PowerPoint 도형 복제
때로는 새 모양을 만드는 대신 모양을 복제하도록 선택합니다. 이를 달성하기 위해 Aspose.Slides는 모양 복제를 지원합니다. 다음은 Python을 사용하여 PowerPoint에서 모양을 복제하는 단계입니다.
- 먼저 Presentation 클래스를 사용하여 프레젠테이션 파일을 로드합니다.
- Presentation.slides 컬렉션에서 슬라이드 참조를 가져옵니다.
- ISlide.shapes 컬렉션에서 원본 및 대상 슬라이드 모양에 액세스합니다.
- addclone() 메서드를 사용하여 원본 슬라이드 모양 컬렉션에서 대상 슬라이드로 모양을 복제합니다.
- 마지막으로 업데이트된 프레젠테이션 파일을 저장합니다.
다음 코드 샘플은 Python의 PowerPoint 슬라이드 내에서 모양을 복제하는 방법을 보여줍니다.
import aspose.slides as slides

# Load presentation
with slides.Presentation("add-ellipse.pptx") as presentation:
    # Access shapes of the source slide
    sourceShapes = presentation.slides[0].shapes

    # Add a new blank slide
    blankLayout = presentation.masters[0].layout_slides.get_by_type(slides.SlideLayoutType.BLANK)
    destSlide = presentation.slides.add_empty_slide(blankLayout)

    # Access shapes of destination slide
    destShapes = destSlide.shapes

    # Clone shapes
    destShapes.add_clone(sourceShapes[0], 50, 150 + sourceShapes[0].height)
    destShapes.add_clone(sourceShapes[0])
    destShapes.insert_clone(0, sourceShapes[0], 50, 150)

    # Save file
    presentation.save("clone-shapes.pptx", slides.export.SaveFormat.PPTX)
Python의 PowerPoint 슬라이드에서 도형 제거
아래 단계에 따라 PowerPoint 프레젠테이션에서 도형을 제거할 수도 있습니다.
- 프레젠테이션 클래스의 인스턴스를 만들어 PPT/PPTX 파일을 로드합니다.
- Presentation.slides 컬렉션에서 원하는 슬라이드에 액세스합니다.
- IShape.alternativetext 속성을 사용하여 특정 텍스트로 원하는 모양을 필터링합니다.
- ISlide.shapes.remove(IShape) 메서드를 사용하여 모양을 제거합니다.
- 마지막으로 업데이트된 프레젠테이션 파일을 저장합니다.
다음 코드 샘플은 Python의 PowerPoint 슬라이드에서 도형을 제거하는 방법을 보여줍니다.
# Load presentation
with slides.Presentation("add-ellipse.pptx") as presentation:
    # Get the first slide
    sld = presentation.slides[0]

    alttext = "User Defined"

    # Loop through shapes
    for i in range(len(sld.shapes)):
        # Find shape by alternative text
        ashp = sld.shapes[0]
        if ashp.alternative_text == alttext:
            sld.shapes.remove(ashp)

    # Save file
    presentation.save("remove-shapes.pptx", slides.export.SaveFormat.PPTX)
무료 라이선스 받기
평가 제한 없이 Python용 Aspose.Slides를 사용하기 위해 무료 임시 라이선스 받기를 할 수 있습니다.
결론
MS PowerPoint는 순서도와 같은 다양한 유형의 다이어그램을 만들기 위해 다양한 모양을 지원합니다. 이 기사에서는 타원, 직사각형과 같은 PowerPoint 모양을 만들고 Python에서 커넥터를 사용하여 연결하는 방법을 다루었습니다. 또한 프로그래밍 방식으로 PowerPoint 슬라이드에서 모양을 복제하고 제거하는 방법을 배웠습니다. 문서를 사용하여 Python용 Aspose.Slides에 대해 자세히 알아볼 수 있습니다. 또한 포럼을 통해 문의 사항을 자유롭게 알려주세요.