บาร์โค้ดแสดงข้อมูลด้วยภาพในรูปแบบที่เครื่องอ่านได้ โดยปกติแล้วจะประกอบด้วยข้อมูลหรือข้อมูลเกี่ยวกับผลิตภัณฑ์หรือบริษัท ซึ่งเข้ารหัสในรูปแบบของตัวเลขและ/หรือรูปแบบของเส้นคู่ขนาน ใน ASP.NET MVC เราสามารถสร้างบาร์โค้ดได้หลายประเภท เช่น Data Matrix, Aztec, Code 128 เป็นต้น ในบทความนี้ เราจะมาเรียนรู้วิธีสร้างและแสดงภาพบาร์โค้ดในแอปพลิเคชัน ASP.NET MVC หลังจากทำตามขั้นตอนดังกล่าวแล้ว เราก็จะได้ ASP.NET MVC Barcode Generator เป็นของตัวเอง มาเริ่มกันเลย
บทความจะครอบคลุมหัวข้อต่อไปนี้:
- คุณลักษณะของเครื่องสร้างบาร์โค้ด ASP.NET MVC
- .NET API เพื่อสร้างและแสดงภาพบาร์โค้ด
- ขั้นตอนในการสร้างและแสดงภาพบาร์โค้ด
- สาธิตเครื่องสร้างบาร์โค้ด ASP.NET MVC
- ดาวน์โหลดซอร์สโค้ด
คุณลักษณะของเครื่องสร้างบาร์โค้ด ASP.NET MVC
เครื่องสร้างบาร์โค้ด ASP.NET ของเราจะมีคุณสมบัติดังต่อไปนี้
- สร้างสัญลักษณ์บาร์โค้ดประเภทต่อไปนี้:
- รหัส128
- รหัส11
- รหัส39
- คิวอาร์
- ดาต้าเมทริกซ์
- EAN13
- EAN8
- ไอทีเอฟ14
- PDF417
- บันทึกภาพบาร์โค้ดที่สร้างขึ้นในรูปแบบต่อไปนี้:
- PNG
- JPEG
- ขสมก
- อีเอ็มเอฟ
- เอสวีจี
- ดูตัวอย่างภาพบาร์โค้ดที่สร้างขึ้น
- ดาวน์โหลดภาพบาร์โค้ดที่สร้างขึ้นไปยังดิสก์ภายในเครื่องของคุณ
.NET API เพื่อสร้างและแสดงภาพบาร์โค้ดใน ASP.NET MVC
สำหรับการสร้างภาพบาร์โค้ดและแสดงในแอปพลิเคชัน ASP.NET MVC เราจะใช้ Aspose.BarCode for .NET API ช่วยให้เราสามารถสร้างและจดจำ 1D และ 2D ประเภทบาร์โค้ด ได้หลากหลาย โปรด ดาวน์โหลด DLL ของ API หรือติดตั้งโดยใช้ NuGet
PM> Install-Package Aspose.BarCode
ขั้นตอนในการสร้างและแสดงภาพบาร์โค้ดใน ASP.NET MVC
เราสามารถสร้างและแสดงภาพบาร์โค้ดในแอปพลิเคชัน ASP.NET MVC โดยทำตามขั้นตอนด้านล่าง:
- ขั้นแรก สร้างโครงการใหม่และเลือกแม่แบบโครงการ ASP.NET Web Application (.NET Framework)

- ถัดไป ในกล่องโต้ตอบสร้างแอปพลิเคชันเว็บ ASP.NET ใหม่ เลือก MVC จากนั้นเลือกสร้าง
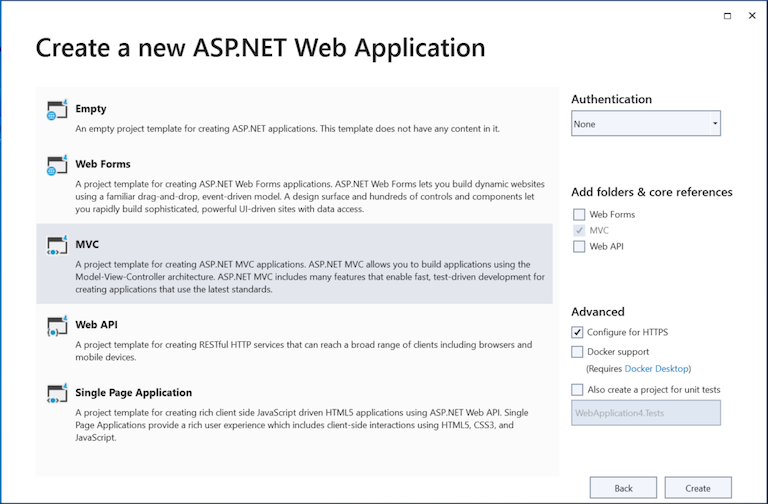
เลือก MVC
- จากนั้นเปิด NuGet Package Manager และติดตั้งแพ็คเกจ Aspose.BarCode for .NET
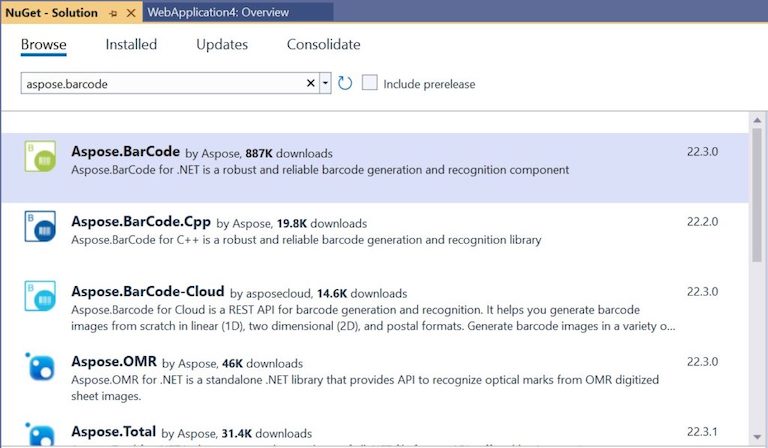
ติดตั้ง Aspose.BarCode for .NET
- จากนั้น สร้างโฟลเดอร์ใหม่ “รูปภาพ” เพื่อบันทึกภาพบาร์โค้ดที่สร้างขึ้น

สร้างโฟลเดอร์รูปภาพ
- ตอนนี้ สร้างโมเดลในโฟลเดอร์ “Models” ด้วยชื่อ “Barcode” เพื่อเก็บข้อมูลบาร์โค้ด
// ข้อมูลพื้นฐานของบาร์โค้ด
public class Barcode
{
    public string Text { get; set; }

    public BarcodeType BarcodeType { get; set; }

    public BarCodeImageFormat ImageType { get; set; }
}
- เพิ่มการแจงนับเพื่อแสดงสัญลักษณ์บาร์โค้ดที่รองรับ สามารถเพิ่มในคลาสแยกต่างหากภายใต้โฟลเดอร์ “Models” หรือเราสามารถเพิ่มในไฟล์คลาส Barcode.cs
// สัญลักษณ์บาร์โค้ด
public enum BarcodeType
{
    Code128,
    Code11,
    Code32,
    QR,
    Datamatrix,
    EAN13,
    EAN8,
    ITF14,
    PDF417
}
- ในทำนองเดียวกัน เพิ่มการแจงนับเพื่อแสดงรายการรูปแบบภาพที่สนับสนุน
// รูปแบบภาพ
public enum ImageType
{
    Png,
    Jpeg,
    Bmp,
    Emf,
    Svg
}
- จากนั้น เปิด Views/Home/index.cshtml และแทนที่เนื้อหาด้วยสคริปต์ต่อไปนี้
@using BarcodeGeneratorMVC.Models

@model Barcode

@{
    ViewBag.Title = "Home Page";
}

<div class="row">
    <div class="col-lg-6">
        <h2>Generate Barcode</h2>
        @using (Html.BeginForm())
        {
            <div class="form-group">
                @Html.Label("Select Barcode Type:", new { @class = "col-md-12 control-label" })
                <div class="col-md-12">
                    @Html.DropDownListFor(model => model.BarcodeType,
         new SelectList(Enum.GetValues(typeof(BarcodeType))),
         "Select Barcode", new { @class = "form-control" })
                </div>
            </div>
            <div class="form-group">
                @Html.Label("Enter Your Text:", new { @class = "col-md-12 control-label" })
                <div class="col-md-12">
                    @Html.EditorFor(m => m.Text, new { @class = "form-control" })
                </div>
            </div>
            <div class="form-group">
                @Html.Label("Select Image Format:", new { @class = "col-md-12 control-label" })
                <div class="col-md-12">
                    @Html.RadioButtonFor(model => model.ImageType, ImageType.Png) @Html.Label("PNG")
                    @Html.RadioButtonFor(model => model.ImageType, ImageType.Jpeg) @Html.Label("JPG")
                    @Html.RadioButtonFor(model => model.ImageType, ImageType.Bmp) @Html.Label("BMP")
                    @Html.RadioButtonFor(model => model.ImageType, ImageType.Emf) @Html.Label("EMF")
                    @Html.RadioButtonFor(model => model.ImageType, ImageType.Svg) @Html.Label("SVG")
                </div>
            </div>
            <div class="form-group">
                <div class="col-md-12">
                    <input type="submit" class="btn btn-default" value="Generate Barcode" />
                </div>
            </div>
        }
    </div>
    <div class="col-lg-6">
        <h2>View Barcode Image</h2>
        @{
            if (!string.IsNullOrEmpty(@ViewBag.ImagePath))
            {
                <div class="form-group">
                    <div class="col-md-12">
                        <img src=@Url.Content(@ViewBag.ImagePath) alt="Barcode Image" />
                    </div>
                </div>
                <div class="form-group">
                    <div class="col-md-12">
                        @Html.ActionLink("Download Image", "Download", "Home", new
                           {                                                     // routeValues
                               ImagePath = @ViewBag.ImagePath,
                               ImageName = @ViewBag.ImageName
                           },
                           null)
                    </div>
                </div>
            }
        }
    </div>
    <hr />
</div>
- จากนั้น เปิดคลาส “HomeController” และเพิ่มผลการดำเนินการใหม่เพื่อจัดการคำขอโพสต์
[HttpPost]
public ActionResult Index(Barcode barcode)
{
    string codeText = barcode.Text;
    string imageName = barcode.Text + "." + barcode.ImageType;
    string imagePath = "/Images/" + imageName;
    string imageServerPath = Server.MapPath("~" + imagePath);

    var encodeType = EncodeTypes.Code128;

    switch (barcode.BarcodeType)
    {
        case BarcodeType.Code128:
            encodeType = EncodeTypes.Code128;
            break;

        case BarcodeType.ITF14:
            encodeType = EncodeTypes.ITF14;
            break;

        case BarcodeType.EAN13:
            encodeType = EncodeTypes.EAN13;
            break;

        case BarcodeType.Datamatrix:
            encodeType = EncodeTypes.DataMatrix;
            break;

        case BarcodeType.Code32:
            encodeType = EncodeTypes.Code32;
            break;

        case BarcodeType.Code11:
            encodeType = EncodeTypes.Code11;
            break;

        case BarcodeType.PDF417:
            encodeType = EncodeTypes.Pdf417;
            break;

        case BarcodeType.EAN8:
            encodeType = EncodeTypes.EAN8;
            break;

        case BarcodeType.QR:
            encodeType = EncodeTypes.QR;
            break;
    }

    using (Stream str = new FileStream(imageServerPath, FileMode.Create, FileAccess.Write))
    {
        BarcodeGenerator gen = new BarcodeGenerator(encodeType, codeText);
        gen.Save(str, barcode.ImageType);
    }

    ViewBag.ImagePath = imagePath;
    ViewBag.ImageName = imageName;

    return View();
}
- หลังจากนั้น ให้เพิ่มผลลัพธ์การดำเนินการใหม่เพื่อจัดการคำขอดาวน์โหลดรูปภาพใน “HomeController”
public ActionResult Download(string ImagePath, string ImageName)
{
    string contentType = "application/img";
    return File(ImagePath, contentType, Path.GetFileName(ImageName));
}
- สุดท้ายให้เรียกใช้แอปพลิเคชัน
สาธิตเครื่องสร้างบาร์โค้ด ASP.NET MVC
ต่อไปนี้เป็นการสาธิตแอปพลิเคชัน ASP.NET MVC Barcode Generator ที่เราเพิ่งสร้างขึ้น
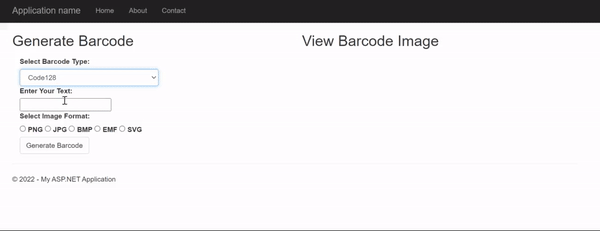
สาธิตเครื่องสร้างบาร์โค้ด ASP.NET MVC
ดาวน์โหลดซอร์สโค้ด
คุณสามารถดาวน์โหลดซอร์สโค้ดทั้งหมดของแอปพลิเคชัน ASP.NET MVC Barcode Generator ได้จาก GitHub
รับใบอนุญาตฟรี
คุณสามารถ รับใบอนุญาตชั่วคราวได้ฟรี เพื่อทดลองใช้ห้องสมุดโดยไม่มีข้อจำกัดในการประเมิน
บทสรุป
ในบทความนี้ เราได้เรียนรู้วิธีสร้างและแสดงภาพบาร์โค้ดในแอปพลิเคชัน ASP.NET MVC เราได้เห็นวิธีดาวน์โหลดภาพบาร์โค้ดที่สร้างขึ้นโดยทางโปรแกรมด้วย นอกจากนี้ คุณสามารถเรียนรู้เพิ่มเติมเกี่ยวกับ Aspose.BarCode for .NET API โดยใช้ เอกสารประกอบ ในกรณีที่มีความคลุมเครือ โปรดติดต่อเราได้ที่ ฟอรัม