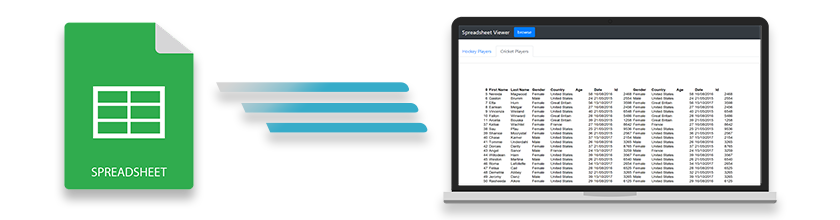
คุณต้องการแสดงแผ่นงาน Microsoft Excel ภายในเว็บแอปพลิเคชันของคุณหรือไม่? คุณกำลังมองหา ASP.NET MVC Excel Viewer หรือไม่? ถ้าใช่ คุณลงจอดถูกที่แล้ว ในบล็อกนี้ คุณจะได้เรียนรู้วิธีสร้าง Excel Viewer และแสดงแผ่นงาน Excel ในแอปพลิเคชัน ASP.NET MVC โดยใช้ C# หลังจากใช้เวลาสักครู่และทำตามขั้นตอนง่ายๆ คุณก็จะได้ Excel (XLS หรือ XLSX) Viewer ของคุณเองและเริ่มทำงาน มาเริ่มกันเลย
คุณสมบัติของ ASP.NET MVC Excel Viewer
ASP.NET Excel Viewer ของเราจะมีคุณสมบัติดังต่อไปนี้ และคุณสามารถปรับปรุงได้ตามความต้องการของคุณ
- เรียกดูและดูไฟล์ Excel
- โหลดไฟล์ Excel เริ่มต้นเมื่อโหลดหน้า
- แท็บเพื่อนำทางระหว่างแผ่นงาน Excel
ขั้นตอนในการสร้าง Excel Viewer ใน ASP.NET MVC
ต่อไปนี้เป็นขั้นตอนง่ายๆ ในการดูไฟล์ Excel ใน ASP.NET MVC
- สร้างเว็บแอปพลิเคชัน ASP.NET MVC ใหม่ใน Visual Studio

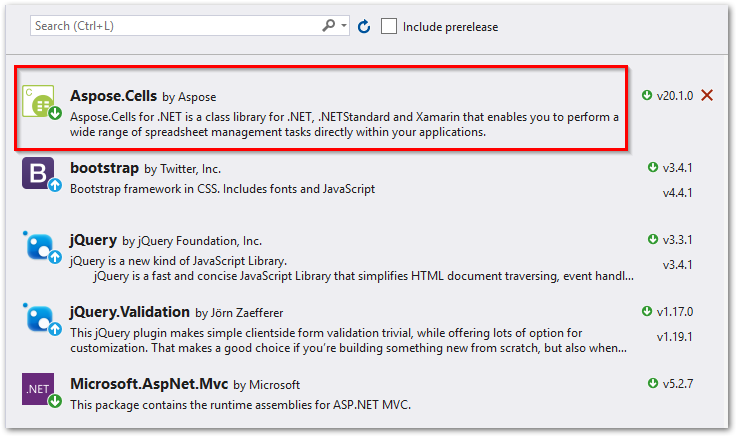
- เปิด NuGet Package Manager และติดตั้งแพ็คเกจ Aspose.Cells for .NET
สร้างโฟลเดอร์ใหม่ “Documents” เพื่อเก็บไฟล์ Excel และโฟลเดอร์ย่อย “Rendered” เพื่อบันทึกภาพที่แสดงผล
สร้างโฟลเดอร์ใหม่ด้วยชื่อ “ผู้ช่วยเหลือ” ในโฟลเดอร์รูท
สร้างคลาสใหม่ที่มีชื่อว่า “Sheet” ในโฟลเดอร์ “Helpers” เพื่อเก็บข้อมูลของแผ่นงาน Excel
public class Sheet
{
	public string SheetName { get; set; }
	public string Path { get; set; }
}
- เปิดคลาส “HomeController” และแทนที่โค้ดด้วยสิ่งต่อไปนี้ ตรวจสอบให้แน่ใจว่าได้แทนที่ชื่อไฟล์ Excel เริ่มต้นในการดำเนินการดัชนี
public class HomeController : Controller
{
	public List<Sheet> sheets;

	[HttpGet]
	public ActionResult Index(string fileName)
	{
		sheets = new List<Sheet>();
		if (fileName == null)
		{
			// แสดงแผ่นงานเริ่มต้นในการโหลดหน้า
			sheets = RenderExcelWorksheetsAsImage("Workbook.xlsx");
		}
		else
		{
			sheets = RenderExcelWorksheetsAsImage(fileName);
		}

		return View(sheets);
	}
	public List<Sheet> RenderExcelWorksheetsAsImage(string FileName)
	{
		// โหลดสมุดงาน Excel
		Workbook book = new Workbook(Server.MapPath(Path.Combine("~/Documents", FileName)));
		var workSheets = new List<Sheet>();
		// ตั้งค่าตัวเลือกการแสดงภาพ
		ImageOrPrintOptions options = new ImageOrPrintOptions();
		options.HorizontalResolution = 200;
		options.VerticalResolution = 200;
		options.AllColumnsInOnePagePerSheet = true;
		options.OnePagePerSheet = true;
		options.TextCrossType = TextCrossType.Default;
		options.ImageType = Aspose.Cells.Drawing.ImageType.Png;

		string imagePath = "";
		string basePath = Server.MapPath("~/");

		// สร้างตัวแสดงสมุดงาน Excel
		WorkbookRender wr = new WorkbookRender(book, options);
		// บันทึกและดูแผ่นงาน
		for (int j = 0; j < book.Worksheets.Count; j++)
		{
			imagePath = Path.Combine("/Documents/Rendering", string.Format("sheet_{0}.png", j));
			wr.ToImage(j, basePath + imagePath);
			workSheets.Add(new Sheet { SheetName = string.Format("{0}", book.Worksheets[j].Name), Path = imagePath });
		}

		return workSheets;
	}
}
- เปิด Views/Home/index.cshtml และแทนที่เนื้อหาด้วยสคริปต์ต่อไปนี้
@{
ViewBag.Title = "Home Page";
string[] files = Directory.GetFiles(Server.MapPath("~/Documents/"), "*.xlsx");
}
@model List<Excel_Viewer.Helper.Sheet>
@{
Layout = null;
}
<!DOCTYPE html>
<html lang="en">
<head>
<meta charset="utf-8">
<meta http-equiv="X-UA-Compatible" content="IE=edge">
<meta name="viewport" content="width=device-width, initial-scale=1">
<title>Excel Viewer</title>
<!-- CSS Includes -->
<link rel="stylesheet" href="//netdna.bootstrapcdn.com/bootstrap/4.1.3/css/bootstrap.min.css">
<link rel="stylesheet" href="https://cdnjs.cloudflare.com/ajax/libs/font-awesome/4.7.0/css/font-awesome.min.css">
</head>
<body>
<div class="container">
<nav class="navbar navbar-expand-lg navbar-dark bg-dark">
<a class="navbar-brand" href="#">Spreadsheet Viewer</a>
<button class="navbar-toggler" type="button" data-toggle="collapse" data-target="#navbarNav" aria-controls="navbarNav" aria-expanded="false" aria-label="Toggle navigation">
<span class="navbar-toggler-icon"></span>
</button>
<div class="collapse navbar-collapse" id="navbarNav">
<ul class="navbar-nav">
<li class="nav-item active">
<button type="button" class="btn btn-primary" data-toggle="modal" data-target="#exampleModal">
browse
</button>
</li>
</ul>
</div>
</nav>
<br />
<ul class="nav nav-tabs" id="myTab" role="tablist">
@for (int i = 0; i < Model.Count; i++)
{
if (i == 0)
{
<li class="nav-item">
<a class="nav-link active" id="@Model[i].SheetName.Replace(' ','_')-tab" data-toggle="tab" href="#@Model[i].SheetName.Replace(' ','_')" role="tab" aria-controls="@Model[i].SheetName">@Model[i].SheetName</a>
</li>
}
else
{
<li class="nav-item">
<a class="nav-link" id="@Model[i].SheetName.Replace(' ','_')-tab" data-toggle="tab" href="#@Model[i].SheetName.Replace(' ','_')" role="tab" aria-controls="@Model[i].SheetName">@Model[i].SheetName</a>
</li>
}
}
</ul>
<div class="tab-content" id="myTabContent">
@for (int i = 0; i < Model.Count; i++)
{
if (i == 0)
{
<div class="tab-pane fade show active" id="@Model[i].SheetName.Replace(' ','_')" role="tabpanel"><br />
<div class="card">
<div class="card-body"> <img src="@Model[i].Path" style="width: 11in" /></div>
</div>
</div>
}
else
{
<div class="tab-pane fade" id="@Model[i].SheetName.Replace(' ','_')" role="tabpanel"><br />
<div class="card">
<div class="card-body"> <img src="@Model[i].Path" style="width: 11in" /></div>
</div>
</div>
}
}
</div>
</div>
<!-- Modal -->
<div class="modal fade" id="exampleModal" tabindex="-1" role="dialog" aria-labelledby="exampleModalLabel" aria-hidden="true">
<div class="modal-dialog" role="document">
<div class="modal-content">
<div class="modal-header">
<h5 class="modal-title" id="exampleModalLabel">Select a file</h5>
<button type="button" class="close" data-dismiss="modal" aria-label="Close">
<span aria-hidden="true">×</span>
</button>
</div>
<div class="modal-body">
<div class="list-group">
@foreach (string s in files)
{
string fileName = Path.GetFileName(s);
@Html.ActionLink(fileName, "Index", "Home", new { fileName = fileName }, new { @class = "list-group-item" })
}
</div>
</div>
<div class="modal-footer">
<button type="button" class="btn btn-secondary" data-dismiss="modal">Close</button>
</div>
</div>
</div>
</div>
<!-- JS includes -->
<script src="//ajax.googleapis.com/ajax/libs/jquery/1.11.0/jquery.min.js"></script>
<script src="//netdna.bootstrapcdn.com/bootstrap/4.1.3/js/bootstrap.min.js"></script> @**@
<script src="//ajax.aspnetcdn.com/ajax/jquery.validate/1.11.1/jquery.validate.min.js"></script>
<script src="//ajax.aspnetcdn.com/ajax/mvc/4.0/jquery.validate.unobtrusive.min.js"></script>
</body>
</html>
- สร้างแอปพลิเคชันและเรียกใช้งานในเบราว์เซอร์ที่คุณชื่นชอบ
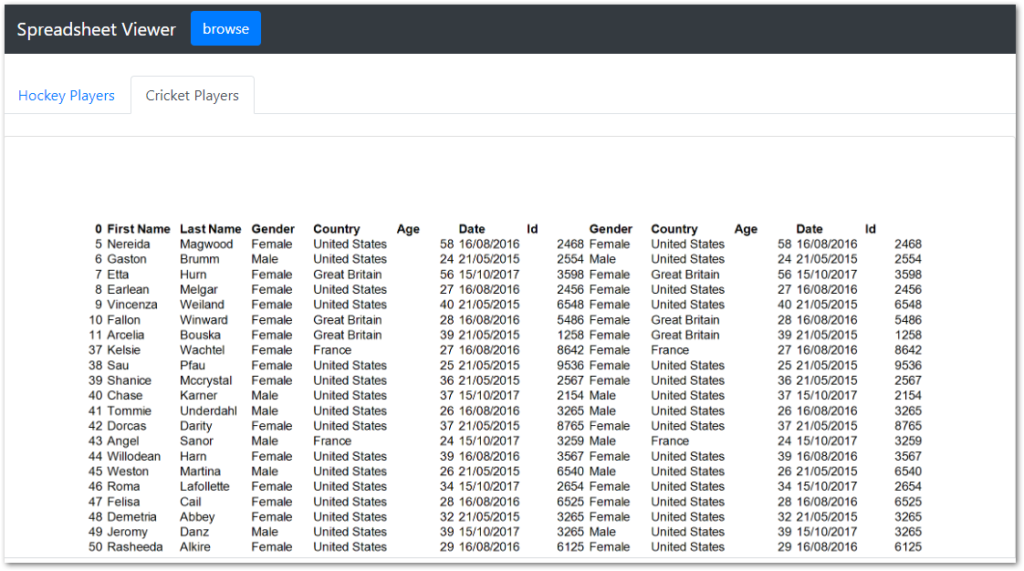
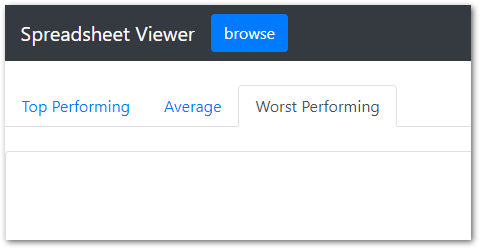
ดูไฟล์ Excel ใน ASP.NET MVC Viewer - สาธิต
ไฟล์ Excel เริ่มต้นจะปรากฏขึ้นเมื่อคุณเริ่มแอปพลิเคชันเป็นครั้งแรก
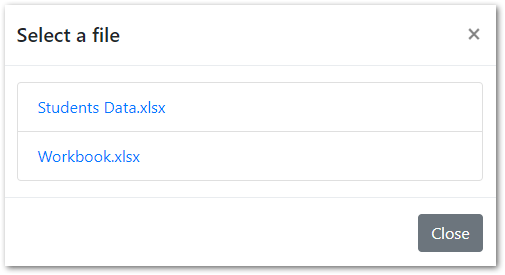
เปิดไฟล์ Excel
ในการเปิดไฟล์ Excel ให้คลิกปุ่มเรียกดูและเลือกไฟล์จากรายการ

นำทางระหว่างแผ่นงาน Excel โดยใช้แท็บ
แผ่นงานทั้งหมดในสมุดงาน Excel จะแสดงในรูปแบบของแท็บ คุณสามารถคลิกแท็บเพื่อนำทางระหว่างแผ่นงาน
ดาวน์โหลดซอร์สโค้ด
แอปพลิเคชันนี้เป็นโอเพ่นซอร์สและมีซอร์สโค้ดบน GitHub
รับใบอนุญาตชั่วคราวสำหรับ Aspose.Cells สำหรับ .NET
คุณสามารถรับ ใบอนุญาตชั่วคราว ของ Aspose.Cells สำหรับ .NET API เพื่อหลีกเลี่ยงข้อจำกัดในการประเมิน/ทดลองใช้