Umbraco’s Export to Word macro allow users to export online content into a Microsoft Word document using Aspose.Words. This macro makes it super simple to get an offline copy of your favorite online content for editing, sharing and printing in most popular Microsoft Word formats (DOC/DOCX). It adds a simple Export to Word button at any desired location on the web page. Clicking the button exports the page content to a Word document and automatically downloads the file to a disk location selected by the user in just seconds.

Export to Word using Aspose.Words
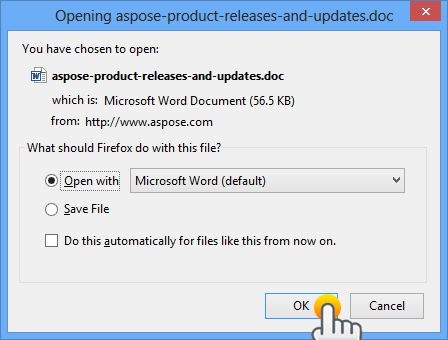
Export to Word output Word document
Installing the Export to Word Macro
Download the Export to Word macro package from one of the following locations:
- Download from CodePlex
- Download from Umbraco Projects
Once downloaded, please follow these steps to install a package into your Umbraco website:
- Login to Umbraco Developer section, for example http://www.myblog.com/umbraco/
- From the tree, expand the Packages folder.
- From here there are two ways to install a package: select Install local package or browse the Umbraco Package Respository.
- If you install local package, do not unzip the package but load the zip into Umbraco.
- Follow the instructions on screen
Note: You may get a ‘Maximum request length exceeded’ error when installing. You can easily fix this issue by updating the ‘maxRequestLength’ value in your Umbraco web.config file.
<httpRuntime requestValidationMode="2.0" enableVersionHeader="false"
             maxRequestLength="25000" />
Using the Export to Word Macro
After you have installed the Export to Word macro it is really simple to start using it on your website. Please follow these simple steps to get started:
- Make sure you are logged-in to Umbraco Developer section, for example http://www.myblog.com/umbraco/
- Click Settings in the list of sections in bottom left of the screen.
- Expand the Templates node and select the template that you want to add the Export to Word feature to, for example Blog post.
- Select the position in the selected template where you want to export button to be added. Usually you probably want to add it to the top right of the page, or the bottom of the page.
- Click Insert Macro on the top ribbon.
- From Choose a macro, select the recently installed Export to Word using Aspose.Words macro and click OK.
Please check the screenshot below for details.
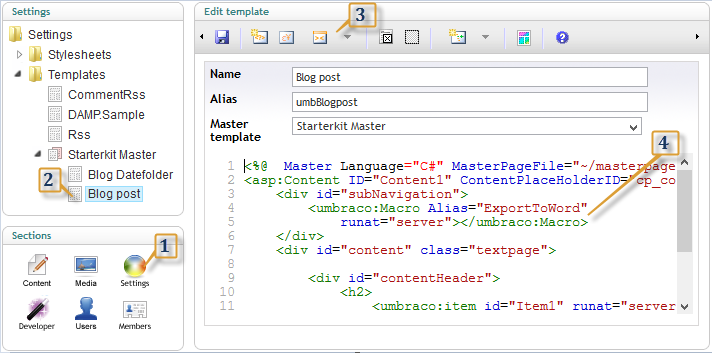
How to use ‘Export to Word’ macro
You have successfully added Export to Word to the template. A button titled Export to Word will now appear on all pages created using this template. Anyone can simply click the button and export the content of the page into a Word document.
Video
Please check the video below to see this macro in action.